|
You are reading the older HTML site
Positive Feedback
ISSUE
28
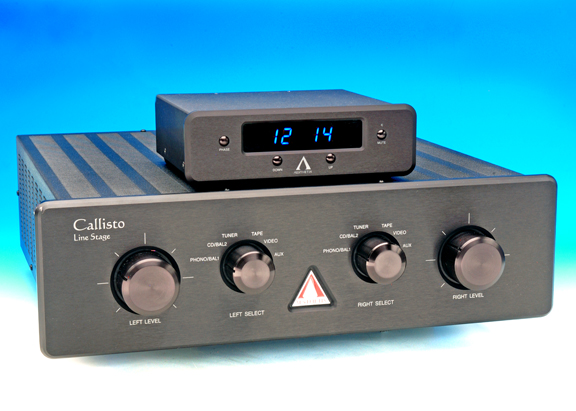
Aesthetix Callisto Remote
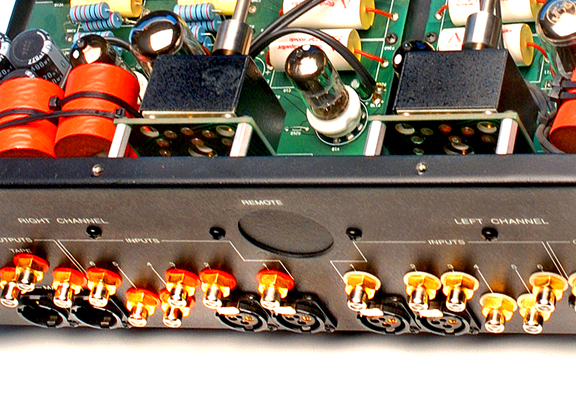
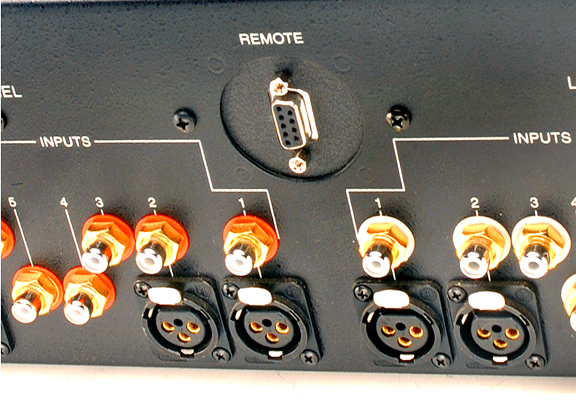
all images and processing by Albert Porter After more than five years of planning and testing, Jim White has finally perfected a remote control for the Aesthetix Callisto. Although prototypes have been displayed at one or more Consumer Electronic Shows over the years, the final version was not available until a few months ago. Customers interested in purchasing a new Callisto may order theirs with the remote factory installed, my understanding is it's available now. If you already own a Callisto the factory or possibly a local dealer can upgrade it to the remote version. Jim White and I have been friends since his Theta days, back when Aesthetix was in its infancy. This is probably why he allowed me a shot at installing this remote in my existing preamp. This is a job for the factory or at least a qualified tech, so I agreed to ship everything back if I failed. For a field upgrade to be possible, the Callisto must have been manufactured within the last six years. The remote was planned for and the chassis altered during the year 2000 production. To check yours, look in the upper center portion of the rear chassis for a punch out (covered by a plate), with white text reading Remote. If yours is not the newer version, the chassis must be replaced before it can be upgraded. It's not recommended this be done anywhere except the factory due to the complexity of the job. The two images below show first, a late model Callisto with the access plate intact and second, the plate removed and the remote control interface plug installed.
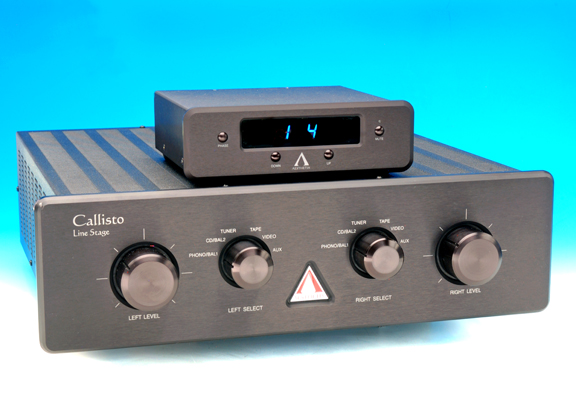
About a week after Jim White and I worked out the necessary details, a large box with parts and instructions arrived at my door. The remote display unit is the first piece that caught my eye, looking much like the main chassis of the Callisto but in miniature. It's grained, black anodized finish is an exact match cosmetically for the preamp and when powered up, its blue numerical display can be read all the way across the room even with bright daylight pouring in from windows and skylights. Under more packing I found the twin stepper motors with their integral cogged wheels and ribbed belts attached. In transparent bags were lots of smaller parts including two flat metal discs with a reflective pie shaped pattern printed on one side, a control board with a DB9 style computer interface plug, two ribbon cables, two replacement Teflon bushings for the original volume control shafts, a hand held infrared remote control unit and a three prong power cord. There is also a sixteen-page instruction booklet with detailed step-by-step instructions including photographs to help identify parts and visually guide your hand as well as an owner's manual with basic operating instructions, electrical specifications and warranty information. A note on the hand held IR remote. This is a small plastic affair; I believe identical to the one supplied with the Saturn series Rhea, Calypso, and Janus. Jim told me an upgraded IR controller is in the works, which will be heavier, higher quality and a cosmetic match for the Callisto. My photo studio workload finally slowed down enough so I could press my shooting table into service as a workbench. It's waist high, measuring four by eight feet and provides ample space for the Callisto main chassis, the remote control kit, all the necessary tools and Hakko soldering station. Best of all, this shooting table occupies a space in my studio where the big Broncolor Hazylight towers overhead; it's a truly marvelous light for doing this kind of detail work. Before I could begin Jim White called to say he had upgraded the instructions again. He sent a replacement via email as a PDF and printing it out, it could pass as the original supplied with the kit. My thanks to Jim for being on top of everything and sharing the factories up to the minute experience. Removing the cover and faceplate to access the inside is the first step required in installing the remote. The image below is representative of what you will see at that stage, before any of the remote parts are installed.
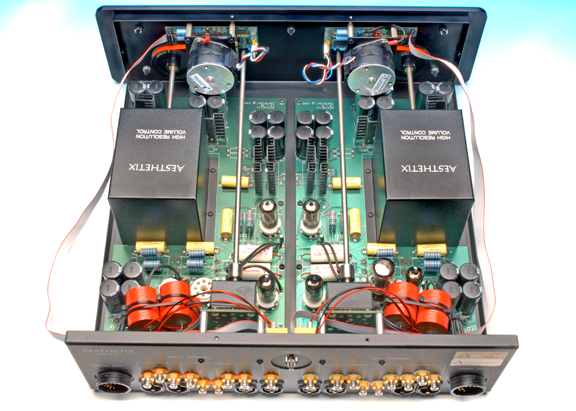
I'll skip forward and show the main parts of the remote installed, which hopefully will clarify the text that follows.
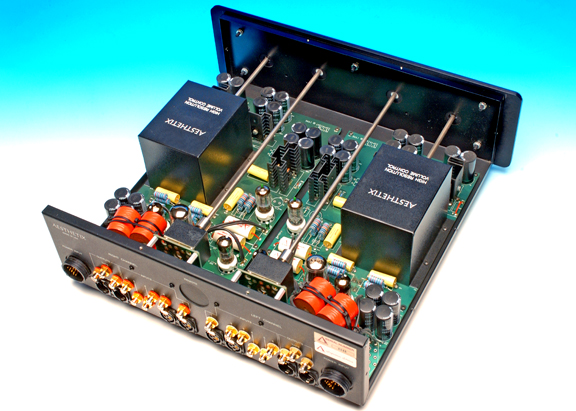
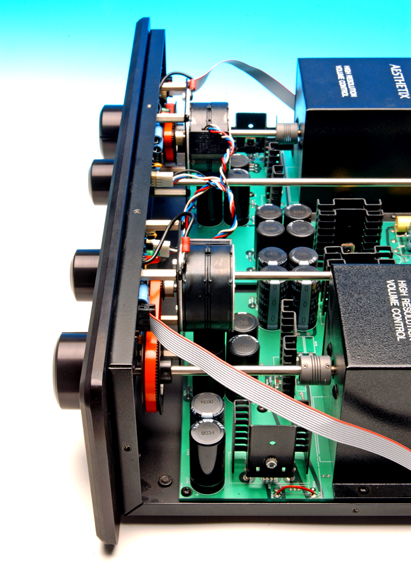
The bottom line, the install went very well and I am pleased with the outcome. Even so, I would not recommend this do it yourself project for everyone. I have experience with Aesthetix going back to the first ever conversion to dual power supplies, which I performed on my original Callisto working from faxes sent by Jim White. Since then I've installed new caps, upgraded resistors and the fuse bypass mod on the power supplies, all of which were approved factory upgrades. Working uninterrupted I required slightly more than five hours to complete the upgrade, finishing around 3:30 in the morning. The truth is, late night is the only peaceful time I have for this kind of work. A typical day with people, meetings, and telephone interruptions, I could devote an entire day and not get done. The mechanical parts are straight forward and not really an issue. The critical tolerances involve adjusting the motors and ribbed belt drives which are coupled to the reflective discs. These discs face the Callisto's front panel (from the inside) and have a built in LED reflecting off of them. Missing the alignment by as little as 1/32nd of an inch will cause the numerical display to error from the true position of the stepped attenuators. The instructions are accurate and stress precision where precision is required. Still, my best attempt required additional adjustment to perfectly match the display to the volume control. In the end this was by far the most difficult part. I must mention the ingenious built in device that guides the alignment of the reflective discs to the volume control. There are two green LEDs only visible within the Callisto that light up with the correct number of clicks when rotating the volume control. These tell you everything is in proper rotation between the reflective discs, the motors and stepped attenuators. This is covered in the instructions so it's not important to discuss further, except to say it's possible (with a bit of luck) to achieve perfect alignment on the first try. Below is a side view of the Callisto with the stepper motors, ribbed belts, ribbon electrical cables, faceplate and control knobs installed. Reflective discs are between the faceplate and the red belt drive.
With everything working properly, the joy of a full function remote makes all this effort worthwhile. My favorite is the balance option, which can be nudged one click at a time without exiting the listening sweet spot. An unexpected bonus is the duplication of volume up, volume down, phase reverse and mute buttons, which are repeated on the face of the display unit. These extra controls are marvelous when you're standing by the preamp, looking at software and suddenly realizing you've left the remote sitting on the sofa. With either set of controls the volume may be raised or lowered one click at a time with confirmation appearing instantly on the display in large blue numbers. Channel balance is achieved in a similar way, one click at a time. By adding slightly higher output to only one channel the sonic results are identical to a traditional balance circuit, but without additional pot, wires and solder joints. The Callisto was designed this way from the beginning and this remote package does not alter that original, elegant design. Too, once a gain difference between left and right is established, pressing the volume up or volume down raises and lowers the system gain while maintaining your previously selected balance. If the balance requires further touching up during the music program, you can add or subtract gain to either channel in single click increments. As with all great remotes, if the phone rings, you need to clean the stylus or select a different source, pressing the mute button silences the preamp. This one is different in a big way, the remote physically rolls both volume controls down to zero and then the output signal is shunted to ground. When mute is pressed again, both volume controls return to your previously selected position (balance and all) and the shunts to ground are unlatched. I wondered why the mute circuit moved the volume down to zero and then shunted to ground. Why not just mute the circuit and avoid moving the knobs? I made a call to Jim White and it turns out the Callisto's output stage drives at maximum gain continuously with the discrete resistor ladder bridge operating as the buffer. So, it's easier on the circuitry to move the attenuators to an ideal load prior to shorting the tubes to ground. My next question was, why not just roll the volume down to zero and avoid the additional circuitry that shunts to ground? This turned out to be an associated equipment safety issue. In case the Callisto is powered on before the amps, muting with the outputs shorted allows the power amplifier to cycle with no audio signal present. This is an absolutely elegant design that protects both the Callisto and all of the components downstream. I must say here, this remote would have been much easier to implement if it were not for the uncompromising design of the original Callisto back in 1993. The twin, 46 step volume controls are a true balanced, discrete ladder bridge resistor network. Jim White's goal was to design a state of the art preamp that was not limited or compromised by a traditional wire wound volume pot. That initial design restricted all easy and proven methods of applying a remote, leaving only the option of physically moving the knobs, exactly as the owner would do if he were turning them by hand. For the user, the remote is easy to use and easy to read, with large blue numbers against a black background. The numbers read 0 through 46, indicating the exact position of each channels volume control. For example, if the remote is used to increase the volume 14 steps above zero, only the numeral 14 is displayed.
If you reduce the gain on the left channel by two clicks, the numerals 12 and 14 will be displayed. Single number if both channels are identical, two numbers if you choose different settings for left and right channels.
All in all the remote is a complicated affair, stepper motors moving one click at a time and shiny discs with pie shaped patterns that serve as targets for LEDs to make the display read properly. In practice, it's a marvel to use and makes listening to music a joy. I love this option, not because I'm lazy, but rather because I did not realizing how often I avoided perfect volume and perfect balance setting cut by cut, until I used the remote for about a week. In fact, I no longer turn the volume controls knobs by hand, preferring the buttons on the display or the hand held remote, raising or lowering both channels accurately and at once. This is not easy to do manually, one knob at a time and clicks must be counted or a lot of light present to see the position of each knob, especially those Callistos finished in black faceplate with black knobs. I did a final test of the hand held remote control to determine range and possibility of error. The longest distance in my home I could move away from my equipment stack was in the corner of my kitchen, about 35 feet. At that distance each of the remote functions worked perfectly and the preamp responded to each set of instructions without a single error. In short, the Aesthetix Callisto is the best preamp ever made and now it is available with a full function remote. For those that delayed their purchase because it lacked this convenience, your wait is over. Albert Porter
Aesthetix Audio Corporation Distributed by:
Musical Surroundings
|