
You are reading the older HTML site
Positive Feedback
ISSUE
29
Cables for Dummies: Journeying into the DIY
Wilderness in the Dead of Winter
by Sam Roberts
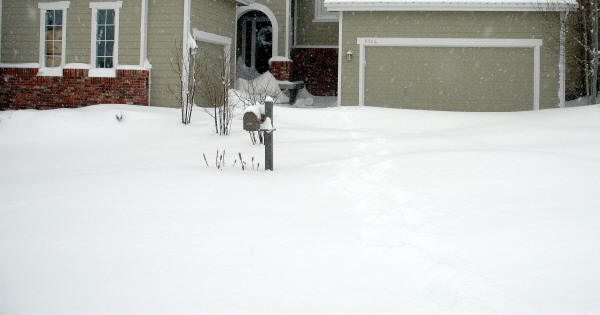
Several years ago on New Years Day, I was out golfing, enjoying a beautiful 60-degree day in Colorado, which is not uncommon for this time of year. You all know what payback is …and this year it has come with a vengeance in the form of four major storms which have given me plenty of quality time to devote to audio tweaking while being cooped up inside between snow-shoveling expeditions to clear the drifts as shown in the picture above. Having dabbled in some DIY (Do-It-Yourself) speaker projects in the past, I decided it was time to embark on a series of new projects, the first being a mild one, making some power cables for my system. I have used several aftermarket power cables in the past including Signal Cable, Virtual Dynamics, Shunyata, and Purist Audio. All of these cables had their own unique strengths, as well as a wide variety of price points; there was no denying they made a difference in my system. For those who feel power cables don't affect the sound of gear, you can stop reading now as this is only going to get worse. After perusing some audio forums and reading about the DIY designs from VH Audio, I decided to try to build a better mousetrap at a lower cost than many of the commercial cables I had been investigating.

I Got the Flavor
VH Audio is a web-based seller of all things cable and connector related, and they stock a wide variety of exotic materials that in many cases surpass those used in kilobuck cables. In addition to their inventory of parts, VH Audio also offers up construction information for all of their "Flavor" cables, which have four versions for different applications. You can get the parts for building your own cables from many places, but few will tell you how to construct one that sounds good. For this reason, VH seemed like a good choice to patronize for the needed parts. I chose to build the Flavor 1 for my Benchmark DAC-1, Flavor 2 for my Aesthetix Janus preamp, and Flavor 4 for my Bel Canto mono amps—based on the recommended use and current capacity of each cable design.
After researching the available components, I decided to use the Oyaide 046 Series connectors for both the male and IEC inlets on the Flavor 1 cable as they used high-end materials such as a Palladium over Gold plating process, and of course, most importantly they looked really cool. Using the VH Audio cryogenically-treated shielded wire and the recommended cable jacketing and shrink tubing, I slowly waded through the assembly instructions from the VH Audio website. After some trial and error including trimming down the ends and beginning again after I managed to cut too much of the jacketing off the shielded cable, I had myself a finished product. This first cable took me about two hours, mostly due to my mistakes and making the final cosmetic touches.
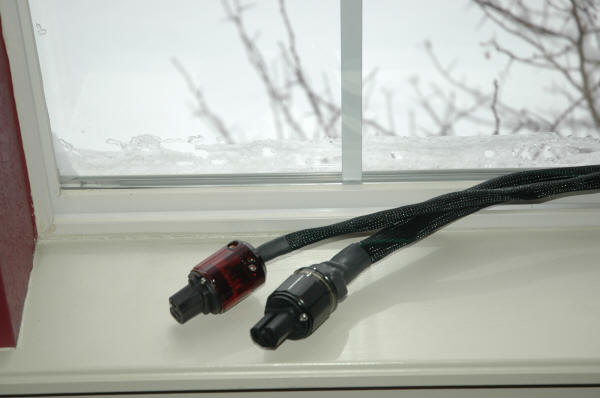
The Flavor 2 and Flavor 4 cables took much less time, partly due to the fact I had a better idea of what I was doing, and partly because I found the unshielded wire and Furutech connectors somewhat easier to work with. I used the Furutech FI-11 series gold plated connectors which seemed like a bargain for their quality, and were also large enough to accept the star-quad wires for the Flavor 4 design. One note on the Flavor 4 cables, VH Audio does not officially publish systematic instructions for this design, but if you read their site, you will find all you need to know about its construction as well. Assembly for the Flavor two cable took about 30 minutes, the Flavor 4 slightly longer due to the higher difficulty of using the star-quad wire as well as the fact I decided to add a cosmetic touch using the light reflective TechFlex sheathing similar to the Acoustic Zen cables to give my amps a little more bling as seen in the picture below. The Flavor 4 is not an entry level cable project and you need to plan things out a little more as getting the rubber hose and shrink wrap on is not as much of a picnic as on the other designs. Dealing with the Flavor 4's 9-awg cable pairs for hot and neutral requires some patience, planning, and ideally a second pair of hands to make the project go smoothly.

It's Alive
I allowed some time to admire my work and shovel the driveway, and then left the cables to burn in for 48 hours on my living room equipment. Routing them into my system was not too much of a chore as the Flavor 1 and 2 cables are fairly flexible and easy to route. The Flavor 4 are not as much so, but not as unwieldy as some cables such as the Virtual Dynamics Nite series I have used in the past. I had been using Signal Cable Magic Power cables in my system and though they are quite inexpensive, I found their performance to be excellent, surpassing that of some cables 3-4 times their price I have used previously. With that said, my initial reaction to the Flavor cords was that they play in an entirely different league. Immediately I was struck by the wealth of detail and bass that was more extended and controlled. Listening to the self-titled album from Rodrigo Y Gabriela I was able to listen at lower volumes and still pick up every detail of their intricate guitar work as well as their hands slapping and toes tapping in the background. Spatial cues were also enhanced and vocals became more realistic and lacked any artificial sheen. As the cables broke in the bass became fuller, filling in a slight midbass leanness that was apparent at first listen. The current capability of the Flavor 4 was massive, and deep bass on tracks by Future Sound of London and Tricky excited the floor and my listening chair with powerful and taut bass energy. Dynamics were seemingly set free and on tracks such as "Planet of New Orleans" by Dire Straights, there was no hint of compression or hardness as the guitar sound grew exponentially. Female vocals had a natural presentation that placed them accurately in space and presented loads of detail while never becoming fatiguing.
Swapping out the Flavor 1 for the Signal
Cable Magic Digital on my DAC produced a less detailed and dynamic
presentation, and also seemed to have a higher noise floor than the
fully shielded Flavor cable. The Flavor 2 also seemed to lower the noise
floor when using the onboard phono stage in my Aesthetix Janus preamp.
The Flavor 2 seemed to have a narrower advantage over the Signal Cables
than the Flavor 1 did, but it did produce noticeably superior detail and
did not add any harshness in doing so. I tried swapping the Flavor 1 and
2 cords, and for the most part the sound was much the same. The Flavor 2
seemed to have a bit more body while the Flavor 1 had more detail and
focus, possibly the difference in connectors or possibly cable design,
but the experiment validated their respective uses in my system.
Swapping the Signal Cables back in place of the Flavor 4 on my
monoblocks resulted in much of the same results. While the Signal Magic
Power cords were very listenable, the Flavor 4 added more dynamics,
spatial cues, and detail to every type of music I put through them. On a
value scale,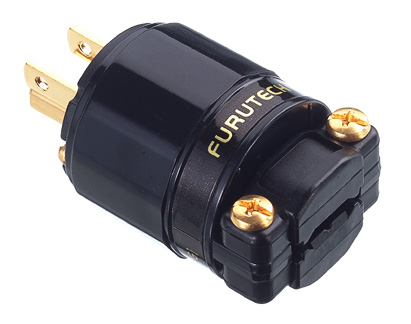 the Flavor 4 are world-beaters as you can build a 3' cable for around
$125-$150 using the Furutech plugs, which I found to work very well.
Most of the commercial cables I have found equal the 9-awg construction
and quality of connectors I used on my Flavor 4 are well over $500 and
most are so stiff and bulky they would probably levitate my little Bel
Canto amps if not carefully tamed to the right contour.
the Flavor 4 are world-beaters as you can build a 3' cable for around
$125-$150 using the Furutech plugs, which I found to work very well.
Most of the commercial cables I have found equal the 9-awg construction
and quality of connectors I used on my Flavor 4 are well over $500 and
most are so stiff and bulky they would probably levitate my little Bel
Canto amps if not carefully tamed to the right contour.
I have no regrets in investing in this project, and my system has provided me even more enjoyment with very little investment. For those looking to dip a toe into the water on higher end power cables the variety of materials and constructions available with the Flavor power cords make it almost impossible not to find a cord that has excellent synergy in your application. VH Audio also offers the Flavor cords pre-assembled for those who don't want to make their own - but what is the fun in that? For a few hours of your time and effort get a great power cord at a great value, enough said.
Stay tuned in the coming months for my next series of DIY projects including Gain clones, a Twisted Pear Audio Kookaburra active linestage, and some speaker projects.