|
You are reading the older HTML site
Positive Feedback ISSUE 59
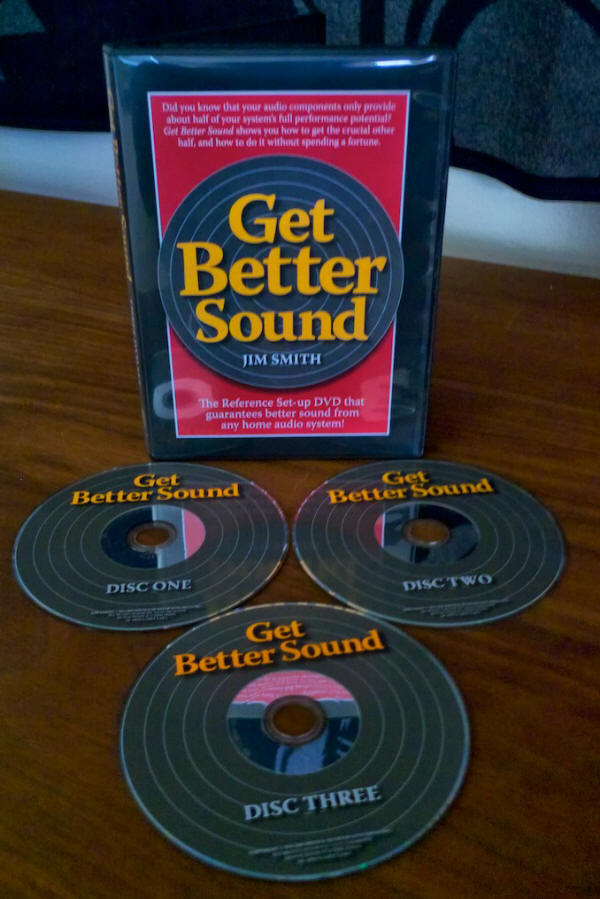
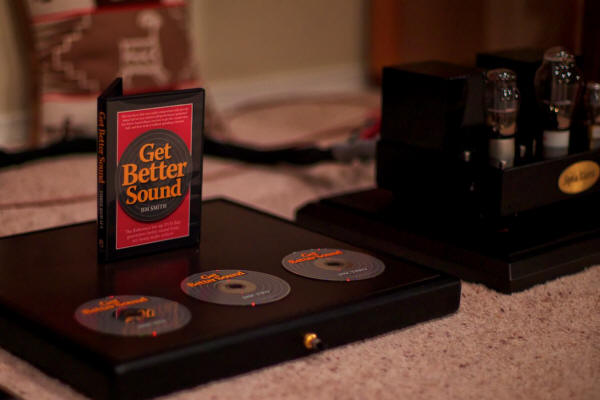
Get Better Sound Three DVD Reference Set
The Man I suspect nearly everyone reading this article will already know about Jim Smith's expertise in Hi-Fi system setup and voicing, as his reputation has become legendary. Just in case there's a few who still don't know about Jim, let me give you a micro-bio about his background: Jim Smith has been in the Hi-Fi business for over 35 years, has worked for manufacturers like Magnepan and Audio Research, has owned his own retail business for high-performance Hi-Fi gear, has imported exotic Hi-Fi gear from other countries to North America as a distributor, has recorded live music performances in his community, and has served as a consultant to numerous high-end marquees. During that time Jim wrote setup manuals for Magnepan loudspeakers, setup dealer demo rooms with their associated Hi-Fi systems, setup countless customer rooms and systems, setup many Hi-Fi show rooms and systems (where he has won numerous 'best sound' awards, including from yours truly), has been a consultant on the setup for many, many, other high performance systems in peoples homes, and other venues. Jim has literally written the book on the setup and optimization of high-performance audio and video systems with his book Get Better Sound, and now Jim has produced a 3-DVD Get Better Sound reference video set that details his setup and optimization techniques so you can see exactly how he does it. Also, Jim now offers a custom setup and optimization service that he calls RoomPlay™ for those enthusiasts who don't have the desire or time to do a complete system setup themselves. More than any other person that I am aware of on our Planet Earth, Jim Smith has the ability to listen to a Hi-Fi system, and then by drawing on his enormous experience and knowledge base related to live and reproduced music, Jim knows exactly what to do to optimize that system's setup, allowing it system to play dramatically better than anyone ever thought possible. I really and truly believe that Jim's unique abilities allow him to get more performance out of $10K Hi-Fi system than the vast majority of Hi-Fi enthusiasts, dealers, and audio reviewers can get out of a $100K Hi-Fi system. Really. Think about that for a moment. You could have a relatively modest investment in a Hi-Fi system, have Jim set it up for you, and smoke your buddies with their $100K Hi-Fi rigs. I am not kidding. I suspect most Hi-Fi enthusiasts are getting far less than 50% of what their systems are really capable of performance-wise. So it shouldn't come as a big surprise that a modestly priced 'David' system that is getting close to its maximum level of performance could kick ass on expensive 'Goliath' systems that are not. For some reason the thought of that scenario gives me a great deal of joy. I told Jim that I thought that he had a magic touch when it came to getting the most performance out of a Hi-Fi system, but Jim was quick to correct me, saying that his 'magic touch' is largely something that can be taught, which of course is the purpose of Jim's book and DVD reference set, Get Better Sound, the latter which is the topic of this article. The Book I consider Jim's book to be an indispensible part of my audio library, and I continually recommend it to Hi-Fi enthusiasts around the world as a way for them to get the most out of their Hi-Fi rigs. Most people don't need to get new Hi-Fi gear to take their system and listening experience to the next level, what they really need to do is sit down and work through the setup and voicing techniques Jim has written about in his book. Really. In Issue 40 I wrote about Jim Smith's book and said, "I highly recommend Get Better Sound by Jim Smith, and I think it should be in everyone's audio library. If you'll take the time to work through Jim's tips and implement them in your Hi-Fi system you'll be rewarded with a transformed system. Don't think about it, just do it. You'll be glad you did." The DVD Set The advice to buy Jim's book is as good today as it was then, and if you haven't yet bought it for your library you should do it right now, before another minute goes by. While you're at it you should also get Jim's new Get Better Sound reference DVD set that was recently released and is meant to accompany his book by providing video lessons designed to help you to see how to work through setting up your system, optimizing it, and voicing it properly. You'll want to have both the book and the DVD handy to get the most out of the setup and voicing techniques Jim teaches.
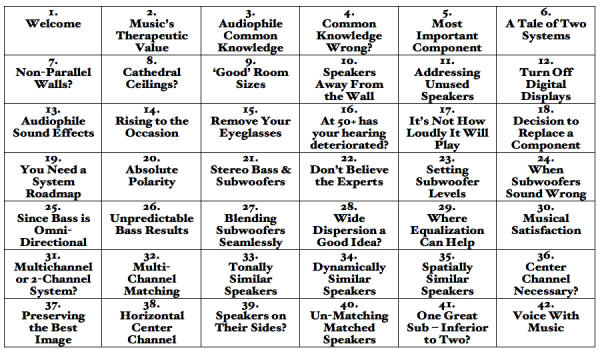
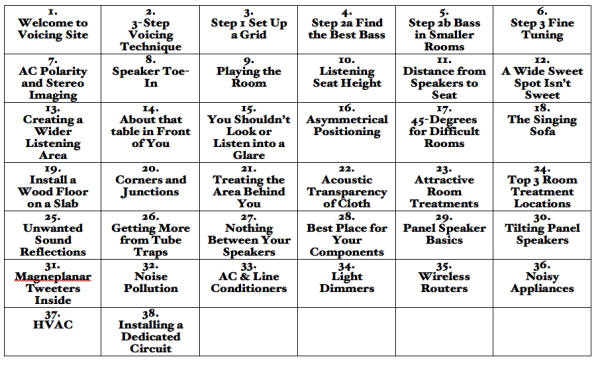
I like to work through Jim's basic setup and voicing techniques with my own Hi-Fi rig for every review I write for Positive Feedback Online. It's the only way I can be assured I will get the best possible performance from my Hi-Fi system and the equipment that is in for review, and every time I do it I learn something new. As an audio reviewer I know that every time I insert a review component into my system it's likely it will change the overall voicing of my system. That means I have to go through my system setup and optimize it around those changes to restore the musical balance to my tastes. It's the only way I can be completely fair to the manufacturers who have entrusted me with reviewing their equipment, and to the readers who might base a buying decision on what I have said about the equipment under review. I owe it to everyone involved to get my setup right so what I write is meaningful. As a music lover or Hi-Fi enthusiast you probably do not need to do the frequent setups and voicings that I do as a reviewer, but I recommend that you work through all of Jim's setup and voicing techniques at least once a year to keep your cherished Hi-Fi rig performing at its hearty best. Schedule it on your calendar once a year as a weekend activity. You can think of it as an annual physical for your Hi-Fi rig. I'll tell you what, if you take care of your Hi-Fi's needs, it will take care of you by providing wonderfully involving listening experiences. Jim's book and DVD reference set, Get Better Sound, may be the single most important 'component' you ever buy for your Hi-Fi system. I hope this article helps relay to you the importance of incorporating Jim's methods into your system setup so you can achieve the full level of musical involvement your system is capable of, and believe me, that potential is a lot higher than you think it is. Watching the Get Better Sound Reference DVD 3-Disk Set While watching the three DVDs in Jim's reference set, what first came to my mind was, "There's really a lot of densely packed information on these three DVDs, Jim has really put a lot of work into this." Having been involved in a little bit of video production for my job in years past, I can tell you that it is a lot of work to produce something like Jim's DVD set. You have to write the scripts for the dialog you want to cover, you have to shoot the video footage to be used, you have to decide if you want to include voiceovers, or add photos or diagrams or animation, or add music, and then combine it so it all works together as an effective whole. That's not easy to do. I'd say there are many hundreds of hours of effort on Jim's part to put all of this together, making the price of $39.70 for the set seem very reasonable indeed. For your money you get five and a half hours of carefully chosen content that will allow you to setup and voice your system so it will 'play the room' and put you into a state of musical ecstasy. That's a bargain! Before writing about Jim's reference DVD set for Positive Feedback Online I sat down and watched every single minute of the content, took notes, and used what I learned to develop a plan for putting it to use in my own system. My goal was not to cover all the content on the DVDs, there's just way too much content to make that practical. Rather, I wanted to make you aware of the content that is on the DVDs and I how I put it to use in my own system in order to give you a feel for how you might put to use the information yourself. You should do just like I did, and view every single minute of the reference DVDs' content even it you don't think a particular lesson applies to you. I recommend you take notes, develop a plan, put together your audio tool-kit, and then work through all of the techniques in your plan while referring back to the book and the DVDs as you go to make sure you've got everything on straight. Getting Started Disk 1 of the DVD set is an introduction to the principles and methods Jim uses to extract maximum performance from your Hi-Fi rig. Jim presents 42 mini-lessons that are each a few minutes long to introduce you to the importance of proper system setup and voicing. The idea is to equip you with the knowledge you need to get the most involving musical listening experience possible from your equipment in your room. In Table 1 I listed each of Jim's lesson topics—that's a lot of good information! Table 1. Disk 1 Lessons.
I thoughtfully watched the lessons on Disk 1 several times while taking notes and considering the content. The lessons fall into the broad topical categories of: 1) Voicing for musical involvement to achieve long-term listening satisfaction (lessons 1, 2, 6, 13, 15, 16, 17, 19, 28, and 30); 2) Listening room considerations (lessons 5, 6, 7, 8, 9, and 10); 3 Hi-Fi equipment considerations (lessons 3, 4, 6, 11, 12, 14, 18, and 20); 4) Optimizing subwoofer performance for music listening (lessons 21, 22, 23, 24, 25, 26, and 27). 5) Optimizing home theater or multi-channel systems (lessons 31, 32, 33, 34, 34, 36, 37, 38, 39, 40, 41, and 42). My primary music system doesn't use subwoofers or multi-channels, so while I listened to those lessons carefully—and I got some some excellent insights—they are not part of my approach to a baseline setup for my system, so I will not discuss them here. If you do use subwoofers or multi-channels you should watch those sections carefully and take notes so you can incorporate the methods discussed into your baseline system setup approach. It's the Music: Voicing for Musical Involvement Voicing my Hi-Fi so it excels at musical involvement is extremely important to me (covered in lessons 1, 2, 6, 13, 15, 16, 17, 19, 28, and 30). I believe that for most music lovers and audiophiles alike, if you don't get the musical involvement aspect of your Hi-Fi right you will be forever unhappy with your system. In these lessons Jim points out that some of the key performance attributes that contribute to musical involvement and long-term listening satisfaction are dynamics, tone, an effortless and 'alive' sound, and a system that is still involving when listened to at low levels. When you get your Hi-Fi rig dialed in using Jim's methods something wonderful happens: all of a sudden you've got a band sitting in your listening room playing an amazing performance just for you. Everything you normally notice in your listening room disappears. There are no walls around you, no ceiling above you, no floor beneath you, and no speakers in front of you. Instead there's just music flowing over your body like a living entity in an exhilarating, interactive, satisfying, and amazing sort of way that makes you remember why you got into this hobby in the first place. Once you have experienced that level of musical involvement you will not be able to settle for a Hi-Fi rig that has not been optimized. When you get your Hi-Fi rig dialed in so it will perform in the manner described above, Jim calls it 'playing the room'. In addition to playing the room, I think a fully dialed in Hi-Fi rig 'plays your body' too (where you can feel the musical textures flow over your body), which will blow your mind with the level of involvement it brings. It's a big deal. Setting your Hi-Fi up so it will play the room is what brings your music to life and makes it involving to listen to every time you sit down for a listening session. Jim says setting your system up so it will play the room matters more than any single thing you can do for your Hi-Fi rig and listening pleasure. You'll know immediately when you're system is setup to play the room because there is an excitement and satisfaction associated with listening that is simply electrifying. It's an experience you will not forget. I experience that effect every time I listen to my system, and so can you, because it's the way your system was intended to perform every single time you listen to it. If you set it up and voice it correctly. It's the Room: Listening Room Considerations Jim puts a well-deserved emphasis on the importance of the listening room in achieving good sound from your Hi-Fi components (lessons 5, 6, 7, 8, 9, and 10), and addresses topics like non-parallel walls, cathedral ceilings, and 'good' room sizes. Jim says the most important 'component' in your Hi-Fi rig is your listening room, and that it "will always make or break the performance and the musical impact of your system. It doesn't matter how much you have invested in equipment, it doesn't matter if you've got the equipment with the best reviews, if it's not playing the room you're not hearing what you've paid for." Jim goes on to say, "I should clarify what I mean when I say 'the room'. Most of us don't have the luxury from selecting from several good rooms. In fact we only have one room, and it may not be wonderful. So the question becomes, "How can I make my system play its best with the room I have?"" So for most of us the idea is to figure out how to best make our system 'play the room' we already have. If your system isn't 'playing your room' correctly, deleterious room effects will largely negate your costly high-performance audio equipment's potential, giving you average sound quality and low musical involvement as a result. There are a few room traits that make it trickier to setup and voice your system so it will play the room correctly, like non-parallel walls and cathedral ceilings, for example. Rooms with those kinds of attributes make the room's response less predictable, so it is harder to dial in your system to play the room correctly. If you've got a symmetrical, rectangular, shoebox style room, consider yourself lucky. It'll be easier to get your Hi-Fi rig sorted out. Jim says that standing waves in the bass are always going to be present in every room, and they're the main culprits in a speaker sounding like it has too much bass, or conversely, sounding too thin. He says most of the time it isn't the fault of the speaker at all, it's just that the speaker isn't working with the room because of where they're located in it. If your room has non-parallel walls you can't predict where the standing waves will be, because the non-parallel wall causes the standing waves to vary every foot in the room. Cathedral ceilings are also problematic, because a cathedral ceiling also introduces ceiling 'walls' into the room that are non-parallel, causing the same unpredictable bass behavior, with the addition of having a fair amount of slap echo going on up in the ceiling that degrades sound quality in the listening position. To stop the slap echo Jim recommends applying room treatments to the ceiling. Then there is the issue of room size, where Jim poses the question "Is there a good listening room size?" As an example, Jim says, "A room that is 19 feet long by 14 feet wide with 10 foot ceilings, if it's not too full of things, generally works exceptionally well." Jim goes on to say that a larger room usually will have less standing wave issues just because it's larger, the smaller the room the more compacted the problems can be. The boundary effects of the walls in producing standing waves are critical from about 300Hz down to the lowest frequencies of your speakers. Let's take my room as an example: I live in a nuevo bungalow-style home, with my main living area serving as my primary listening room (said living area is 27' 6'' long by 20' 4'' wide, and with variable ceiling height from 9 to 20 feet). Room construction consists of sheet rock walls, with a partial cathedral ceiling over where my speakers and listening seat are located, and a concrete slab floor (carpeted). The living area behind the listening position opens to a combination kitchen/dining room, and there is also an opening to an entryway on the right side wall.
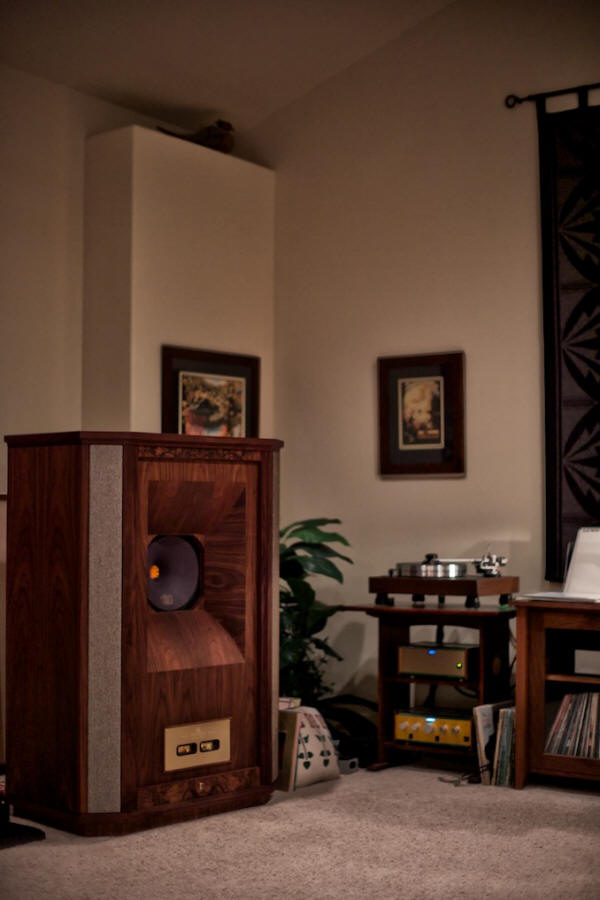
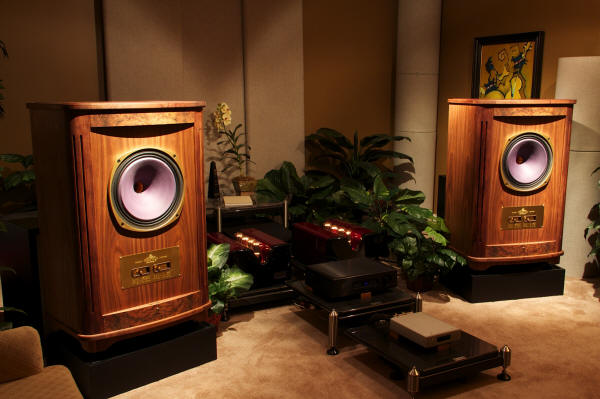
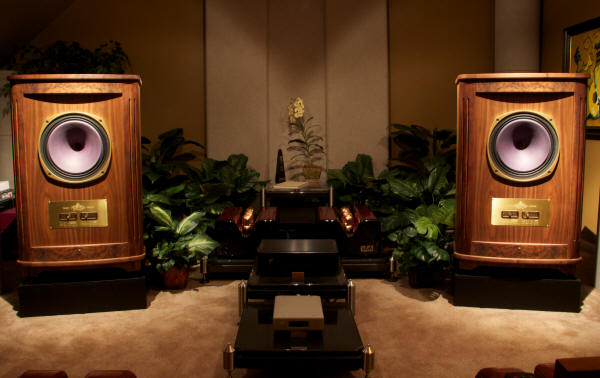
So while I don't have any non-parallel walls in my listening area, I do have a cathedral ceiling over part of the listening area, a beam that bisects the left to right ceiling of the room, a non-parallel kitchen island behind the listening position, and there are several non-symmetries because of openings in the room that connects it to adjacent living spaces. My room is a little bigger than Jim's suggested 19 x 14 x 10 feet room, but the length to width ratio is nearly identical. So my room has potential problems associated with the cathedral ceiling, some non-symmetry of openings into other rooms, limitations on where I can place equipment and listening seats, and so forth, which makes it more difficult to predict the effects of standing waves on bass response. In other words I have a difficult room, but I've managed to get my system to sound rather wonderfully musical using Jim's methods, and you'll be able to do the same thing if you have a difficult room too. It's the Equipment: Or is it? In order to 'play the room' as Jim describes it, I think you have to have a loudspeaker-amplification combination that is appropriate to your room size to get the best results. For example, the pairing of small inefficient monitor-style loudspeakers with a low powered amplifier to fill a large room with music just doesn't work well. Regardless of what you do in setup and voicing with that combination it's unlikely to work out because it's the wrong choice of components for the room size. A room-equipment mismatch if you will. It's the equivalent of using a lawn-mower engine to power a semi-truck—it just won't cut it. If you have a small listening room be sure to choose a pair of loudspeakers designed for small rooms, like the pair of Harbeth Super HL5 loudspeakers that I use in a small room for my 'real world' small-room reference system. Harbeths are designed for small BBC-sized rooms and near-field listening where they work like a champ. When I've put my Harbeths into a large room for far-field listening they just don't work as they were intended to. A small room size of about 3 x 4 meters was a major part of the equation for their voicing process, and the results will likely leave you unhappy if you stray too far from that. Room size matters when you choose a pair of loudspeakers, so it's best to be thoughtful about your choice. This is where a good dealer is invaluable, because the dealer will help guide you to appropriate products for your listening room size and help you avoid costly mistakes. In my large listening/living room—the subject of this article—I use Tannoy Westminster Royal Special Edition loudspeakers. The Westminster Royal SEs are large horn-loaded loudspeakers that are designed to fill large rooms with music, which gives me a good match of loudspeakers to room size. So let's assume you have a loudspeaker-amplification combination that is appropriate to your listening room size. When a system isn't sounding the way it should it's tempting to buy a new component in an attempt to fix the issue. The 'buy new equipment' approach rarely works, because it's probably not the equipment that's at fault, it's more likely that the room-equipment interface hasn't been optimized adequately to 'drive the room'. Rather than equipment, Jim says the poor sound is more likely due to the voicing of the important 192Hz to 384Hz range being out of whack (it should be flat to slightly elevated for enhanced musical involvement), non-optimum loudspeaker positioning in the room, non-optimum listening position in the room, too wide of dispersion at the listening position, standing waves from the room that negatively impact bass performance, or having incorrect absolute polarity. So you can optimize your system by making sure that voicing in the 192Hz to 384Hz range is flat or slightly elevated for enhanced musical involvement, by positioning your loudspeakers correctly, by finding the best listening position, by going for narrow dispersion at the listening position, by addressing standing waves in the room by positioning the loudspeakers correctly, using room treatments when necessary, and making sure that you have correct absolute polarity. One of things that I found really interesting while I was watching the DVD lessons was that the amount of emphasis that came through on certain aspects of setup (like absolute polarity, for example), that don't really come through with the same sense of emphasis in the book. When you hear Jim talk about it you really get a sense for how important he considers having the correct polarity is, and it made me really pay attention. One of the benefits of the DVDs is that you get additional insights from listening to and watching Jim, insights that you just can't get from reading the book by itself. You really need to do both. Let's say you've decided to replace a component, but how do you keep from making a mistake? Jim says the best way to avoid making a mistake when replacing a component with a new component is to define what you want to improve and what you're not willing to compromise on when replacing a component. When you have done that you can start narrowing the list of potential candidates through listening sessions, which will give you a lot better chance of getting the performance you want—and your money's worth—out of your next equipment purchase. This will help keep you off the dreaded equipment merry-go-round. A System Roadmap Having watched all the introductory lessons on the first DVD, I decided it was time to put together my system roadmap. My thoughts for my system roadmap are as follows: The Room: I don't have the opportunity at this time to build a dedicated symmetrical listening room in the dimensions of 19-feet long by 14-feet wide with 10-feet high ceilings as Jim has discussed, but rather I must make due with my 27' 6'' long by 20' 4'' wide room that has a partial cathedral ceiling, some non-symmetries, and a variable ceiling height of 9 to 20 feet. That means I'm going to need to think about applying room treatments to my cathedral ceiling to reduce slap-echo effects and perhaps other room treatments as well. The Gear: Given my personal preference for the timbral-based new-old style of Hi-Fi listening that has evolved over the past 40-years, I like to use a turntable equipped with a classic cartridge for playing vinyl records, vacuum tube preamplification and equalization electronics, singled-ended-triode (SET) amplification to power my loudspeakers, and sensitive horn-loaded loudspeakers to fill my room with music. I've found that this sort of system approach gives me the dynamics, tone color, and the effortless and 'alive' sound that I crave. Like Keith Aschenbrenner (of Auditorium 23 fame) has said about listening to this sort of system, "…it was just like a musical Christmas present… the harmonic integrity and musical realism were astonishing." This equipment approach makes for an incredibly involving presentation of musical performances, which has made my long-term listening satisfaction level skyrocket. Given my room is rather large, I've chosen loudspeakers known to work well for filling a large room with music, the Tannoy Westminster Royal Special Editions. I absolutely love the WRSE's, and when properly setup, their presentation of the music is absolutely spellbinding. It turns out that Jim Smith also recently purchased a pair of Tannoy Canterbury SE loudspeakers for his own use (the Canterbury SE uses a 15" version of the Tannoy Dual Concentric™ driver with an Alcomax 3 magnet system and the Tannoy PepperPot WaveGuide™ that is similar to the WRSEs, but in a more room-friendly cabinet size optimized for mid-sized to large rooms). Jim's powering them with the beautiful Viva Aurora 845 SET amps and he says it's a wonderful combination: "Anyway, you know the feeling of listening to music with them … they are equal opportunity speakers, more so than any in my experience. Blues, Baroque, full scale orchestral, jazz trios, rock and roll, solo voices, they do it all… I think I'm jazzed a bit)".
As you can imagine, given the fun we've been having with our Tannoys, Jim and I have been trading a few emails back and forth talking about our experiences. Here are the conclusions that we have come to: the Tannoy-SET approach provides perhaps the best overall presentation for an audio system that either of us has ever heard. The Tannoys don't do soundstaging artifacts as well as the best audiophile-style loudspeakers, but they come closer than you would expect. They probably do have the most cohesive top-to-bottom presentation of any speakers we've heard (that 15-inch dual concentric driver is a gem). The Tannoys certainly provide the best presence, tone, and musical involvement of any speakers either of us has heard to date. As a special treat to Tannoy owners, I'm going to be writing a long term report on living with my Westminster Royal Special Edition loudspeakers, and in that article I'll be going through all the setup tips I've learned over the last year, and I'll also be sharing with you all the discoveries Jim's made in Tannoy setup and optimization too. Believe me, with the Tannoys you'll be rewarded more than with most speakers if you practice careful setup, because Tannoys are capable of delivering more musically than any speaker I am aware of when done right. I have some very special surprises to share with you, so stay tuned to Positive Feedback Online to find out the whole Tannoy story in the near future.
I've paid particular attention to getting a loudspeaker-amplification combination that matches my room size well. I've picked 300B amplifiers to power the Royals because there seems to be a particular synergy between the two for the size of my room. As much as I love 45 and 2A3 based SET amps, they just don't have enough power when combined with the WRSEs to fill my large listening space with live-like levels of full-bodied music in an effortless and alive fashion, but rather the sound ends up as coming across as a bit strained dynamically due to a lack of power. I have yet to try 845 SET amplifiers (like Jim's Viva Auroras) on my WRSEs, but I'd like to. A VPI 30th Anniversary Classic 1 turntable, its JMW-10.5i tonearm mounted with a classic EMT TSD 15 phono cartridge, along with a matching Auditorium 23 moving coil step-up transformer, a Leben RS-30EQ vacuum tube phono equalizer, and a Leben RS-100 vacuum tube line preamplifier rounds out the front end. This combination of equipment matches the size of my listening room, and gives me a sense of the musical realism, exquisite textures and colors of timbre and tone, and the dynamic truths I crave in my music listening. My Listening Bias: As a result of my being drawn towards the musical content of recordings more than audiophile-style sonics, I tend to be a bit more of a Eastern-style timbral listener than is typical for a lot of Westerners, meaning that the reproduction of the textures, colors, and tones and overtones in the music are really important to me. To this end I look for timbral realism at the band level (the band's signature 'sound') and at the individual instrument level (the unique 'voices' of instruments). I want them to sound recognizably like themselves in tone and texture, so that their full tone color can develop, which I think helps lend a feeling of beauty and expressiveness to the music. Western-style, I also listen for the melody (the tune you 'whistle while you work'), harmony (treble and bass accompaniments to the melody) and rhythm (the steady beat that determines the tempo), and I like my reproduced music to have a life-like flow and connectedness in how the musicians interact—just like in real life. I want dynamics (variations in loudness) to evoke that which I hear in life for an emotional connection to the melody and rhythm. For loudness I like my music playback to be capable of live levels, which for the kind of music I listen to the most, jazz, usually means 80 dB or louder. Recently I was in Chicago listening to a live blues band at Blue Chicago, and halfway back in the room—20 feet or so—the sound levels were hitting 96dB on peaks. Live music can be loud! I seldom listen at really soft levels, so that is not so important to me. I do want tempo portrayed so that both the mood and speed of the music are conveyed through it, just like it is with music in real life. I consider the sonic performance of a Hi-Fi rig on the non-musical artifacts of the recording process to be of value, but of less importance to me than the performance on the musical content of recordings. So things like transparency (being able to 'see' into the recording), soundstage (the three dimensions of the recorded space in width, height and depth), sound-space (the noticeable acoustic 'space' of the soundstage in a recording), and imaging (the feeling of solidity and localization of instruments and musicians on the soundstage) are important to me, but they are not as important to me as an involving presentation of the recorded musical content is. System Optimization and Voicing Approach I recommend that you do just as I have, and create a table with all of the topics on Jim's DVDs (or use my tables from this article). Then as you watch every topic on the DVDs, identify those topics on the tables that apply to you and your system, take good notes about each of those topics, and perhaps re-read those sections in Jim's Get Better Sound book to really help it all to sink in. That's the core information you'll use to build your strategy for system optimization. Given that my room and equipment are relatively fixed variables, that leaves me with working out a plan based on Jim's methods that will help me optimize my system and voice it to my tastes, extracting the maximum musical and sonic performance out of it in the process. So with that all of that in mind, I highlighted the lessons and notes from watching the first DVD that I thought would best help me to achieve my system roadmap goals, and they will help guide me formulate my baseline system setup strategy. Here's what I came up for my for a first cut: As part of my roadmap I've decided I'll want to install some room treatment products onto my cathedral ceiling at some point in the future.
Now with that in mind let's take a look at the second DVD and dig in a little deeper about how to proceed. On Disk 2 of the DVD set Jim presents another 39 mini-lessons that deal directly with the specifics of setup and other important considerations. Table 2. Disk 2 Lessons.
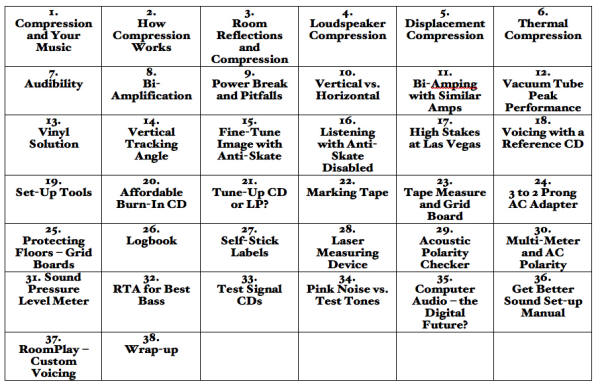
In Disk 2 Jim goes on-site for a system voicing to show us how he works his magic. Jim considers this the most important section in the reference set, because this is where he goes through the process of voicing a system for maximum emotional involvement. Jim's 3-Step Voicing Technique Jim says the three steps of his voicing technique have to be followed in a certain order to lay the foundation. First Jim puts down a grid to find out where the speakers need to be generally, second Jim finds the best position for the listening seat, and third Jim fine-tunes the locations of each until he achieves maximum performance. Jim doesn't put the grid down a certain distance away from the walls necessarily, pointing out that it's best not to let the construction of a house determine how good the sound quality can be. Rather, Jim places the grid into the room, and the reference becomes moving the speakers and listening seat around on the grid for the best performance, which largely removes the walls from the equation. Applying Jim's 3-Step Voicing Technique to My Own Hi-Fi For my own Hi-Fi rig I followed Jim's example, and measured halfway into the width dimension of my room. I placed a piece of tape on the floor to mark the spot. Then I placed a tripod with a target on it on the halfway spot, and moved my Westminster Royal SE loudspeakers equidistant from the target using my laser 'tape-measure' device. I placed my Westminster Royal loudspeakers 105-inches apart center-to-center, and 54-inches out into the room (measured from the front of the cabinet). The centers of the drivers are 36-inches high, or approximately ear high at the listening position. I then made sure the West's were perfectly level to ensure the drivers were at the same angles so that imaging wouldn't be compromised. Next I placed a target on the listening seat and adjusted the West's so they were equidistant to the seat-target on both sides of the diagonal. Getting the Bass Right Jim says getting the bass right is the most critical aspect for dialing in the best sound. This is not done by moving the speakers around, but rather by locating the listening seat in the best location. To find the best position for the most natural bass, I walked up and down the central axis of the speakers to find the smoothest integration for all the bass notes. I came up with two locations, one at approximately 126-inches from the speakers, the other at 156-inches from the speakers. I placed my listening position in both spots and gave it a listen. Bass notes sounded really good in both locations actually, and I could live with either position from a bass standpoint, but this is where things actually start getting interesting in my listening room. Magic Angle Listening The 126-inch seating position gave me a width (105-inches) to diagonal (126-inches) ratio of 0.83, which tends to be a 'magic-angle' for a lot of systems and rooms, and which Jim suggests as a good starting point to work from to get your listening position location dialed in. At the magic angle the sound was impressive, with a very deep, wide, tall soundstage. Imaging was solid. To use an analogy from photography, this position reminded me of what I get visually when using a wide-angle lens on my Leica M9 camera, and shooting with a smaller aperture (say my Leica 18mm f/3.8 Super-Elmar-M aspherical lens at 5.6 or greater). With such a lens I get a large field of view in the width and height dimension (the analogy is a wide and high soundstage) with a lot of depth of field due to the small aperture (the analogy is a deep soundstage). In photography you also get a perspective distortion from this sort of arrangement, where parallel lines converge oddly, and images within the photo appear to be falling backwards or side-to-side somewhat. Speakers are a little bit like camera lenses in reverse, projecting images at aural wavelengths towards our ears, and I think that certain aspects of the science of optics applies to the way the drivers project sound at the listener, and by altering that projection it changes the way a listener perceives the sound, much like using different camera focal lengths changes the way photos look. I get a type of 'perspective distortion' from the music, in my room, with my equipment, and with my speakers at a ratio of 0.83. Here's what I heard: the soundstage width, depth, and height is impressive, with solid images, a high degree of transparency, a high level of detail recovery, and a nice large sense of space. The 'perspective distortion' I heard was that the non-musical recording artifacts related to the soundstage width, depth, height, imaging elements, transparency, detail recovery, and sense of space, are amplified related to the musical elements of a recording like timbre, tone color, melody, harmony, rhythm, dynamics, and tempo. This amplification of recording artifacts causes a shift in the way musical content is perceived, by changing the timbral palette somewhat, which subtly shifts the tonal color palette, and also has subtle effects on things like the way melody, harmony, rhythm, dynamics, and tempo are perceived. So what I hear at this positioning is superior sonics in the audiophile sense, but a somewhat distorted and degraded musical content compared to what I hear in live music or superbly presented Hi-Fi. I've spent so much of my life listening to live music perhaps I am more sensitive to these sorts of effects when listening to recorded music than most, so you may want to take my comments with a huge dose of salt. But that's what I hear. Music Angle Listening The 156-inch seating position gave me a width (105-inches) to diagonal (156-inches) ratio of approximately 0.67. At 156-inches for the listening seat position, I got a more natural presentation of the timbral palette, the tonalo are portrayed. However, there is no question that in this position the audiophile style presentation of non-musical recording artifacts is not as good as at the 0.83 position, as soundstage depth becomes shallower, detail recovery becomes somewhat less, imaging elements decrease somewhat, and transparency becomes somewhat less. However, the whole listening experience becomes more like you hear in life, and more emotionally engaging. Now there are some really interesting things that happen at the 0.67 position in my room. All of a sudden the whole room becomes suffused with the music, and you can quite literally feel the timbral textures (and other elements of the music) on the surface of your body instead of just hearing it with your ears. It's like being immersed in a sea of sound interacting with your body such that you feel the music as well as hear it. Mostly I listen at levels in the mid-eighties, so I'm not talking really loud levels. This effect creates an incredibly engaging musical experience with almost any music, regardless of the recording quality. Listeners who are musicians and only semi interested in audio picked up on these phenomena first. Personally, I have never experienced this before with an audio system so it came as quite a shock. This is what Jim call's 'playing the room' and I think there is something about the Tannoys design that takes the room-play effect to astonishing levels. I have wondered if I couldn't get more of a high-performance audiophile-style sound as well as the room-play effect if I was able to position my speakers further out into the room, but because of the multi-use nature of my living-listening room it makes it hard to do that. At my previous home—in another large listening room—I had my Avantgarde Duos 8-9 feet out into the room and I really got great sound, but I never got anything remotely like the room-play effect that I get with the Westminster Royals. There's something unique about the way the Tannoys portray music when properly setup that just has to be heard to be believed. My room's a little problematic because of some of its features and limitations on speaker and listening seat placement, so that may very well account for the variation from the 0.83 magic angle. I suggest you start with your listening position at 0.83 and work from there, but if there's a second seating position that gives well integrated bass give it a try too. You never know what the result might be. Dialing in the Tonal Balance and Staging According to Jim, the last thing to dial-in the tonal balance and staging. The way you dial in the tonal balance is to move the speakers closer together or further apart. Bringing the speakers closer together warms things up, moving them further apart leans things out. I like listening to a variety of female vocals to dial in tonal balance; Rickie Lee Jones, Joni Mitchell, Judy Collins, and Margo Timmins, for example. I already knew about where my speakers needed to be (105-inches) for good tonal balance, but if I didn't here's what I'd do: I'd sit down and give Rickie, Joni, Judy, and Margo a listen. Do their voices sound thin? If so, I'd move the speakers closer together until their voices warmed up. By moving the speakers closer together or further apart I'd refine the tonality to my tastes. The distance you favor will depend on your speakers, your room, and your personal taste. Experiment to see what works best for you. Once I have the ladies voices dialed in with a natural amount of body and tonality, then I moved on to dial in the staging via adjusting toe-in of the speakers. I toed the Westminster Royals about halfway in between firing straight ahead and firing directly at the listening position. The insides of cabinets were still visible from the listening position, and the tweeters were firing at an intersection point quite a ways behind the listening position. This positioning of the Westminster Royals produced a deep, wide, and high soundstage, as well as natural and solid imaging. What I found is that very small adjustments of the listening position, speaker separation, and toe-in can have dramatic effects on how well the speakers play the room. A one-inch difference can make a significant difference musically. You'll know it when you get the toe-in right, because everything will 'lock-in' musically and sonically. I ended up moving my speakers back by 1-inch and changing the toe-in slightly, and the sound opened up rather dramatically, suffusing my listening room with the recordings' sense of space. You'll recognize when you get the right setup, as the improvement is dramatic. I'm going to skip discussing the rest of the lessons on Disk 2, because it's just too much to cover in a review. You should work through each of the lessons, just as I did, and you will be rewarded with a profound improvement. I might also mention that yours truly got a mention in Lesson 17. In that lesson Jim discusses trying to setup a particularly difficult room at CES, and how he got it to work well. Both Bob Harley and myself voted it as one of our "Best Sound" rooms. Even though Jim was a little glum about the room when I stopped in, I still distinctly remember my visit to Jim's CES room, and how good his Avantgarde and BAT system was sounding. So if you've got a really difficult room you'll want to pay extra-special attention to Lesson 17. Table 3. Disk 3 Lessons.
The first six lessons on Disk 3 address a very important topic—compression: Jim says compression reduces dynamic contrasts, which are a major part of stimulating an emotive response while listening to music. So if you reduce dynamic contrasts you strip emotional impact out of the music, which reduces listener involvement. Jim says uncontrolled bass and unwanted room reflections cause a form of room compression that can be addressed, which diminishes the dynamic contrasts your Hi-Fi system is capable of. So by taking care of your room to minimize bass standing waves and unwanted room reflections, your room will take care of you by allowing your system to have greater dynamic contrasts which will give you greater listening satisfaction. Upon reflecting on it, I think one of the reasons I enjoy my Westminster Royal SEs so much is because they are capable of such realistic dynamic contrasts, which gives a very live-music like emotional involvement when listening to music. There's so much good information on Jim's reference DVD set to talk about that it would be easy to go on and on, but I'm going to stop here. I took notes as worked through the DVDs, developed a plan, put together an audio tool-kit (Jim's discussion on putting together an audio toolkit is worth the price of admission alone), and then I worked through all of the techniques in my plan while referring back to the book and the DVDs as you go to make sure you've got everything on straight. I'm not kidding when I say this: Jim's Get Better Sound DVD set and book may be the single most important component you buy for your Hi-Fi rig.
Final Thoughts One thing that is very evident when viewing Jim's Get Better Sound reference 3-DVD set is that Jim really cares about his customers, and he wants you to get the kind of performance out of your Hi-Fi system that your investment warrants. I wish more brick and mortar Hi-Fi shops felt like Jim does towards their customers. Most of the time when I visit Hi-Fi shops incognito, arrogant Hi-Fi sales people treat me like crap, and I suspect that's how most potential customers get treated. It's no wonder brick and mortar shops are struggling. I can't help but wonder that if the bricks and mortar Hi-Fi shops treated their customers with courtesy, respect even, and offered a setup service that was based on Jim's methods if they wouldn't be getting a lot more customers, and customers that would be devoted to them for what they could do for their system. In this time when online sellers are competing with the local Hi-Fi shops for every purchase, I can't help but believe that what brick and mortar crowd needs is the human touch. A human touch of a friendly greeting, good equipment advice, and human hands that come over to set up a system to get the most out of your investment would be all but irresistible once word got around. If I had a Hi-Fi shop I'd be begging Jim to come let me visit and train me and my staff in his setup methods so I could do the same thing service to my customers. Just think of the bragging rights you'd have being able to tell customers Jim trained you in his methods. Good service never goes out of style, and it brings repeat customers. As an individual, I doubt there's anything you could do for your Hi-Fi system and listening satisfaction that would do more good than to work through the techniques Jim demonstrates on the Get Better Sound Reference DVD 3-Disk set. If you'll take time to apply Jim's techniques to your Hi-Fi system, you'll make the equipment you already own come to living, breathing, and musical life in front of your ears. Do Jim's techniques work? You bet they do. You could spend twenty-thousand dollars on new components for your Hi-Fi rig and not get the kind of improvement working through Jim's techniques will yield. The price of $39.70 for the set is a ridiculously good buy, and it will very likely change the way you think about audio forever. As the Nike advertisements say, "Just do it!" You'll be glad you did.
|